I thought I would finally attempt to give a step by step on how I create something in Photoshop. Many of the questions we most frequently get e-mails about are in regard to photography. I am a graphic designer, NOT a photographer (although I do absolutely love to take and edit photos), and so please know that this is just a step by step of how I do it and not by any means how it necessarily should be done.

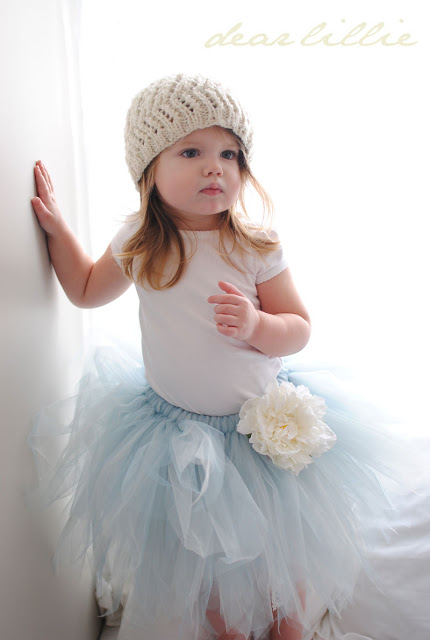
I much prefer to work with photos that I take outdoors because they generally need far less work but for the sake of this tutorial I decided to use an indoor shot that required multiple steps so that I could show a tutorial that covered quite a few things. This photo was taken in Lillie’s window seat in her bedroom so I was able to get some good natural light but it is just not the same as taking a photo outdoors, in my opinion. I have a Nikon D3000 and that is what I used for this shot. I took it using my Nikon DX AF-S Nikkor 35mm 1:1.8G lens. I took this photo back in January so I can’t remember what I had my settings at (I always shoot in manual mode) but I know I had a pretty shallow depth of field to help blur out the window. Next time I do a photoshop tutorial I will try to take note of what my settings were. As far as Photoshop goes I use CS5.
Here is the photo I started with. The color is pretty dull and not that great of a shot.
Step 1. I ran Pioneer Woman’s Boost Action at about 60%

This is what it looks like after Step 1:

2). Next I ran Pioneer Woman’s “Bring on the Eyes” action at about 60%. When I use this action I often have to play around with it a bit depending on the photo. Sometimes I only use it at about 20% and sometimes as high as 75%.

3).Then I ran Pioneer Woman’s “Sharpen This” action also at about 60%. I focused on her facial features with this action. Sometimes I only use it at about 50% and sometimes at the full 100%.

This is what it looks like after Steps 2 and 3:

Step 4. I then used the clone tool and got rid of some of the shadows on the wall and blurred out the background a bit more.
Here is what it looked like after Step 4:

Step 5. Then I ran Paint The Moon’s “Make My Skin Perfect” at around 35%.
Here it is after Step 5:

6) Next I decided to make this a landscape of portrait so I changed my canvas size and then moved my photo over to the left side and used both the paint tool and clone tool to smooth things out.

Here is what it looked like after Step 6:

7). After that I cropped the photo a bit and then ran Florabella’s Len’s Flare.
Here is what it looked like after Step 7:

8). I then ran Pioneer Woman’s Boost again, this time at 100%.
Here it is after Step 8:

9). Then I ran my final action on this shot to give it a vintage feel. I used Florabella’s Retro Vintage action at 70%.
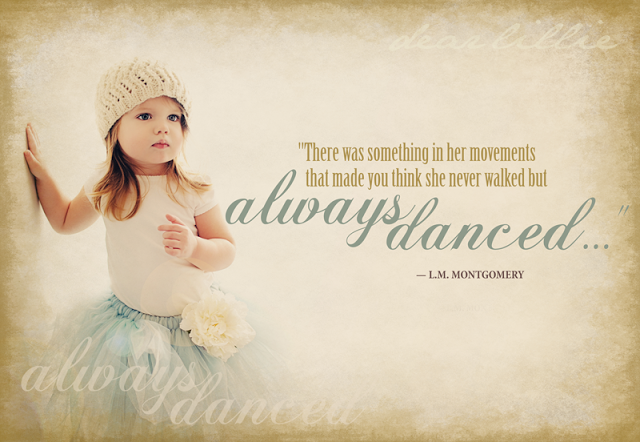
Here it is after Step 9:

Step 10. I actually used it as is after Step 9 to print out but then for fun played around with it a bit more. I added Florabella’s Grunge Texture and then noticed a chunk of Lillie’s hair that was sticking out so I cloned that out. That is normally something I would have done at the very beginning before I did anything else but I was doing this really quickly and didn’t even notice it until the end! Whoops!
Here it is after Step 10:

Step 11. I actually originally added the words in Illustrator because I prefer to work in Illustrator whenever possible. However for the sake of this tutorial I did them in Photoshop and saved them as PNG files so that the background could remain transparent.
And there you have it!

And here you can see the side by side before and after:

I uploaded both of the texts as PNG files if you want to download them. However, I am afraid they will loose their transparency when you do download them. I am not sure how that works exactly when uploading and downloading PNG files over the internet.


For this tutorial I just stuck with basic instructions for a whole bunch of steps. If there are steps you would like to see in more detail or other things you would like to see in Photoshop let me know in the comments section and I will try to focus on those the next time I do a Photoshop post.
I hope you all have a wonderful Thursday!
*****************
I am so sorry if you are having trouble commenting on this post or the Fiona and Twig one. Blogger seems to be acting up somewhat again!
*******************


This tutorial is awesome! I always wondered how you got your photos to look so beautiful. I even love the photos of your home. I'm using Aperture (mac's program) for editing but I'm only just starting to get familiar with it.
You are such a rock star!
You are now my go-to girl for any all Photoshop related questions.
Ha! Betcha weren't expecting THAT. 😉
XO,
Anne
I've always wanted to learn how to use Photoshop. Thanks for the tutorial!
ty so much for the tutorial! What version of photoshop do you use?
Hallelujah!!!! I saw this post pop up in my blogger dashboard yesterday and got giddy! Then I clicked and it didn't work. I came back this morning just to see if it was there and I am so glad it is! I know I drive you crazy with my photography questions! Do you have a reflector on her to bounce the light back? I have tried the "in front of the window" shots and Jemma is so dark. I bump up my meter and it blows out the back. I would appreciate any advice! I love love love this post and am going to give it a go in my Elements! Thank you Jennifer. You are the best!
P.S. I also found out that I need to calibrate my monitor. I did a one year old shoot and when I printed the pictures, they were so much darker than my monitor. Have you ever calibrated your monitor?
Thanks so much for this, I have photoshop and have no clue what to do with it. I will give this a try, thanks for sharing.
Gorgeous photo by the way, I love your blog!
Fantastic tutorial! I'm a pro photoshop user but just starting to try my hand at the Florabella actions so this was super helpful!
Diane T.
Just gorgeous! One year I'll get photoshop. 🙂
You lost me on step one ;). But then again, I just got photoshop elements a few weeks ago, and I guess some features might be different. I need to be less afraid to try them out. Thanks for the tutorial, I love all of your pictures.
-Kristel
Forgot to ask, which Programs do you recommend for actions and textures? Thanks so much.
-Kristel
wow! I do graphic design and I never knew about the downloadable actions! Thank you!!!
I've used photoshop for a long time, but mostly just for abstract stuff. This post and your fantastic work has really inspired me to give some real photo editing a try. Thansk for the great tips and links.
SUCH a GREAT post!!! I loved it…now I'm trying to work up the gumption to buy the photoshop textures.
🙂
shaunna
I have a question about step 6. When you change to canvas size, what do you put in as your measurements? I have to change the numbers. I am using Elements 9 so it may be different in PS. I am loving this!!!
Wow! Thank you so much. following you now 🙂
Could you repeat that….slowly? Just kidding…very well thought out and presented tutorial.
Debbie
P.S. I do believe you could dress that baby in a gunny sack and she'd still be gorgeous!
GREAT tutorial. Shana from Florabella is one of my best friends…we talk almost daily. I really should spend more time making my photos pretty but I have so little time these days. Hope you are all well:)
This made me feel a lot less intimidated by Photoshop! I think I will be purchasing the software after all! Thanks!
Hi, love the tutorial, thanks for it. I love photography but don't think know much about what's what, like what settings to use, lighting, I just play with it with lots of different options and different angles, directions and then pick my pictures, but I love graphic design, I can too do that and love it, playing, doing different things, quotes, etc… 🙂 Anyways to my question, hope you can answer me, please. 🙂 The software, is it just Photoshop CS5 or Adobe photoshop CS5…? Not sure if their different or the same ones.
-Thanks again.
It is the same thing. The full name is Adobe Photoshop CS5 and that is the editing program I use and love it!
absolutely stunning!!! i'm so glad you provided a step by step tutorial on this! I really need it!! I just found your blog through Pinterest, and i'm hooked!!! I'm now your newest follower!!
Thanks for a great tutorial. I tried to download/upload a couple of actions several months ago and couldn't ever find them once I downloaded them. I have a MAC and perhaps I'm just not familiar enough with the system. Maybe PW's actions would be more user-friendly! Thanks again!
great photo…you are good, I should stop using my auto mode in my camera 🙂
A tutorial on how to apply the textures would be Great!
Hi, could you provide instructions on how you moved your photo over once you made the canvas size larger. I'm having troubles with this action. Also, how did you import the "phrase" and blend the two together to look so amazing?
Do you have to a special edition added onto photoshop for this? I can't find it in my photoshop cs5?…
Anonymous – What is it that you are looking for? I just have the normal version of CS5.
I like the helpful information you provide in your articles. I’ll bookmark your weblog and check again here regularly. I'm quite sure I’ll learn lots of new stuff right here! Good luck for the next!
Gill Athletics 800G 50M Javelin Boys
Just a quick note: to save the quote as a PNG file, click on the quote and then choose "open link". Once the graphic opens in a new window, right click and choose "save as". It will save as a PNG file. Hope this helps.
Beautiful work! Just found your blog and will be following.
So can this be done in Photoshop Elements?
I have not ever used Elements, just CS5, but I would assume so.
Does anyone know if Pioneer Women's actions work with PSE 11? On her website it isn't listed. Any help would be greatly appreciated! Thanks
I much prefer to work with photos that I take outdoors because they generally need far less work but for the sake of this tutorial I decided to use an indoor shot that required multiple steps so that I could show a tutorial that covered quite a few things. rent in london
Greetings! Very helpful advice in this particular post! It is the little changes which will make
the largest changes. Many thanks for sharing!
Here is my web page :: speed up my computer
I think the admin of this web site is in fact working hard in support of his website,
because here every stuff is quality based stuff.
my web site :: direct download movies
What's up, the whole thing is going sound here and ofcourse every one is sharing facts, that's in fact fine, keep up writing.
My website free iphone
This is so beautiful, exactly what I hope I can learn to do.
Thank you so much for your generosity in sharing your knowledge!
jean yates
These are great, thanks
So…. Advertisement for Pioneer Woman, I assume.
We have no affiliation with Pioneer Woman whatsoever. I just love her actions and they are FREE so enjoyed sharing some things that can be done with them.
hi..Im college student, thanks for sharing 🙂
Does they have your permission for use the photo?
https://www.facebook.com/revistabenditasite
They did not! Thank you for letting us know. We have contacted them, and they have since removed our photo from their facebook page. Thanks for looking out for us!